Table of Contents
Dangerous Myths: Why You Should Not Use Oil, Alcohol, or a Syringe to Remove a Tick
Before we get to the correct technique, let's permanently debunk the "folk methods." In a panic, many owners recall these, but it's vital to understand: they are not just ineffective; they are dangerous.
-
Myth 1: Douse the tick with oil (sunflower, mineral), petroleum jelly, or gasoline.
Why it's dangerous: The idea behind this myth is that the tick will suffocate and back out on its own. The reality is much worse: the tick does indeed begin to suffocate, and in response it can regurgitate a large amount of its saliva back into the bite wound, which may contain pathogens for dangerous diseases (Babesiosis, Lyme disease). This dramatically increases the risk of infection. This is contrary to the recommendations of major veterinary sources such as the CDC and AVMA.
-
Myth 2: Use a syringe to create a vacuum.
Why it's dangerous: This method almost never works. It's nearly impossible to create a sufficient vacuum on fur. In the best-case scenario, you'll just waste time; in the worst, you'll damage your dog's skin or tear the tick's body from its head.
-
Myth 3: Burn the tick or douse it with alcohol or iodine.
Why it's dangerous: This causes the same shock reaction in the tick as oil, provoking a backflow of saliva. Additionally, you are very likely to give your dog a chemical or thermal burn.
-
Myth 4: Yank it out forcefully.
Why it's dangerous: The tick's mouthparts (proboscis) have barbs that anchor it in place. If you just pull, there is a very high chance you will tear the body off, leaving the head embedded in the skin, which can cause inflammation and infection.
Step-by-Step Protocol: How to Safely Remove a Tick from a Dog
Now, let's proceed to the only correct and safe method recommended by veterinarians. Having dismissed the dangerous myths, we will focus on the protocol that minimizes risk for your animal. This requires not force, but finesse. The Cavapoo Puppy Dog team has successfully followed this protocol many times with our own dogs.
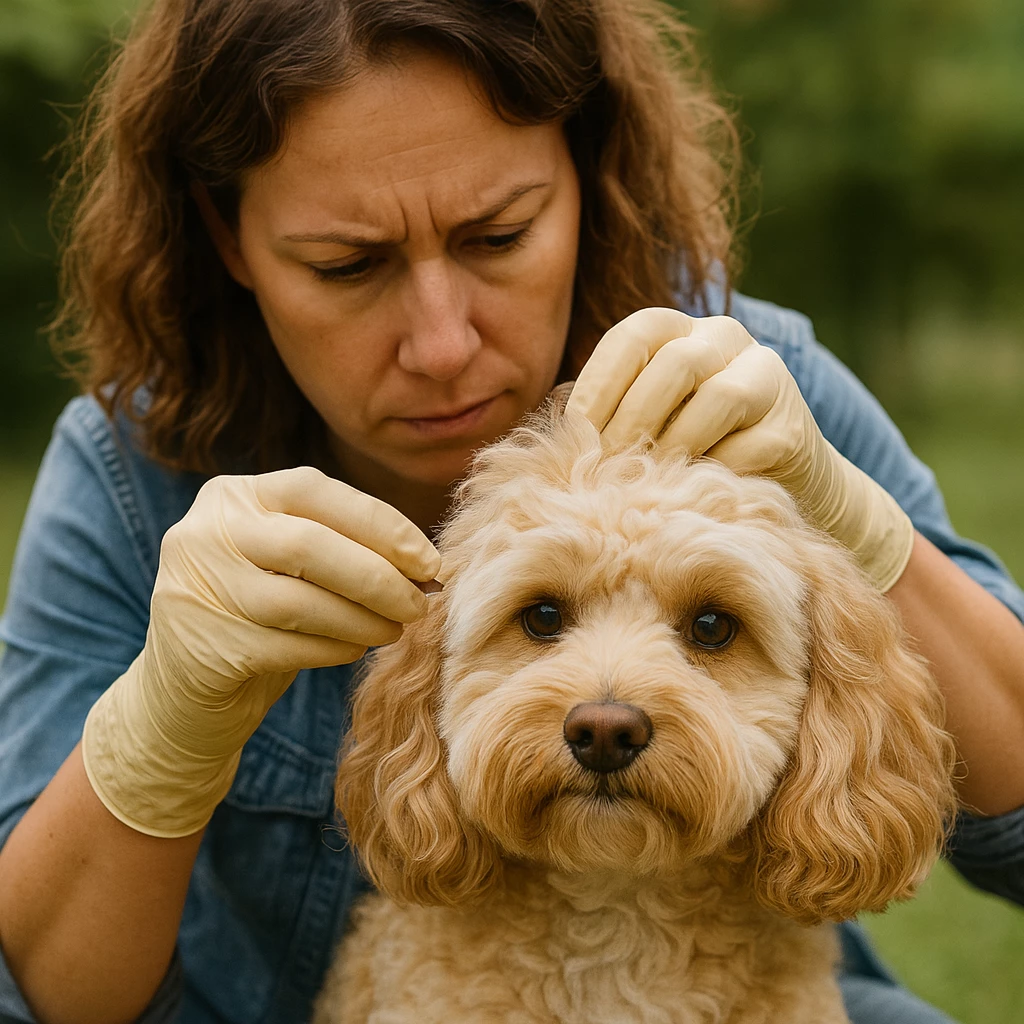
Step 1. Preparation: Tools, Gloves, and Restraining Your Dog

The success of the entire procedure depends on proper preparation. Before you touch the tick, take a few minutes to ensure you have everything ready, your dog is calm, and you yourself are safe.
- Your Safety: You must wear rubber or medical gloves. Some tick-borne diseases can also infect humans, and transmission is possible through micro-tears in your skin if you come into contact with the tick's body or fluids.
- Tools: The ideal option is a "tick remover tool" (or tick twister), which looks like a small crowbar with a slot. It's sold in many pet stores and is usually very inexpensive. If you don't have one, fine-tipped (not blunt) tweezers will work.
- Preparing the Dog: Calm your pet. Ask a helper to hold the dog, distracting it with treats or affection. Choose a well-lit area so you can see clearly.
Step 2. Removal Technique: Twist, Don't Pull!
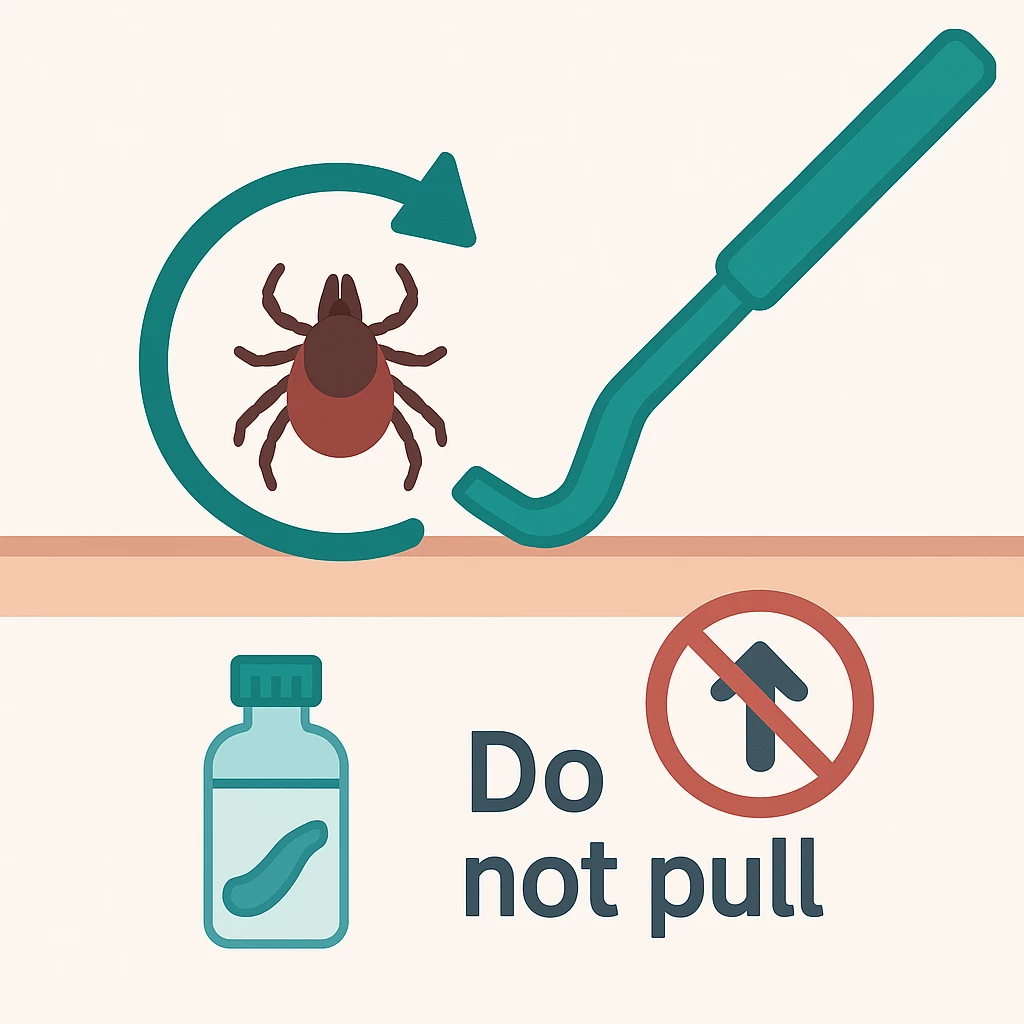
This is the most critical step. The entire difference between a safe removal and a retained head is in this one motion. Remember: we do not pull, we twist.
- Carefully part the fur around the tick to get clear access to it.
- If you have a tick remover: Slide the "fork" of the tool under the tick's body, as close to the skin as possible, so the tick is caught in the slot.
- If you are using tweezers: Grasp the tick as close to the skin as possible, at its mouthparts (head). Never squeeze the tick's swollen body! Doing so can inject its contents directly into your dog's bloodstream.
- The Key Movement: Begin to gently TWIST the tick, as if you were unscrewing a screw. The direction (clockwise or counter-clockwise) does not matter. Do not pull straight up! Do not jerk! Just rotate calmly. Usually, after 2–3 full rotations, the tick's barbs will release, and it will come out whole.
Step 3. Aftercare: Treating the Bite Area

You have successfully removed the parasite. Congratulations! But the job isn't finished. It is now crucial to immediately and correctly clean the bite area to help prevent a secondary infection.
- Examine the tick (ensure it is whole, with its head) and the bite wound (ensure no black dot is left).
- Clean the bite area with an antiseptic. Chlorhexidine (0.05%) is an excellent choice.
- Do not use alcohol, iodine, or hydrogen peroxide! They can burn the sensitive skin and, more importantly, mask the initial signs of inflammation (redness), which is important to monitor in the first few days.
Step 4. Disposing of the Tick: Disposal or Testing?
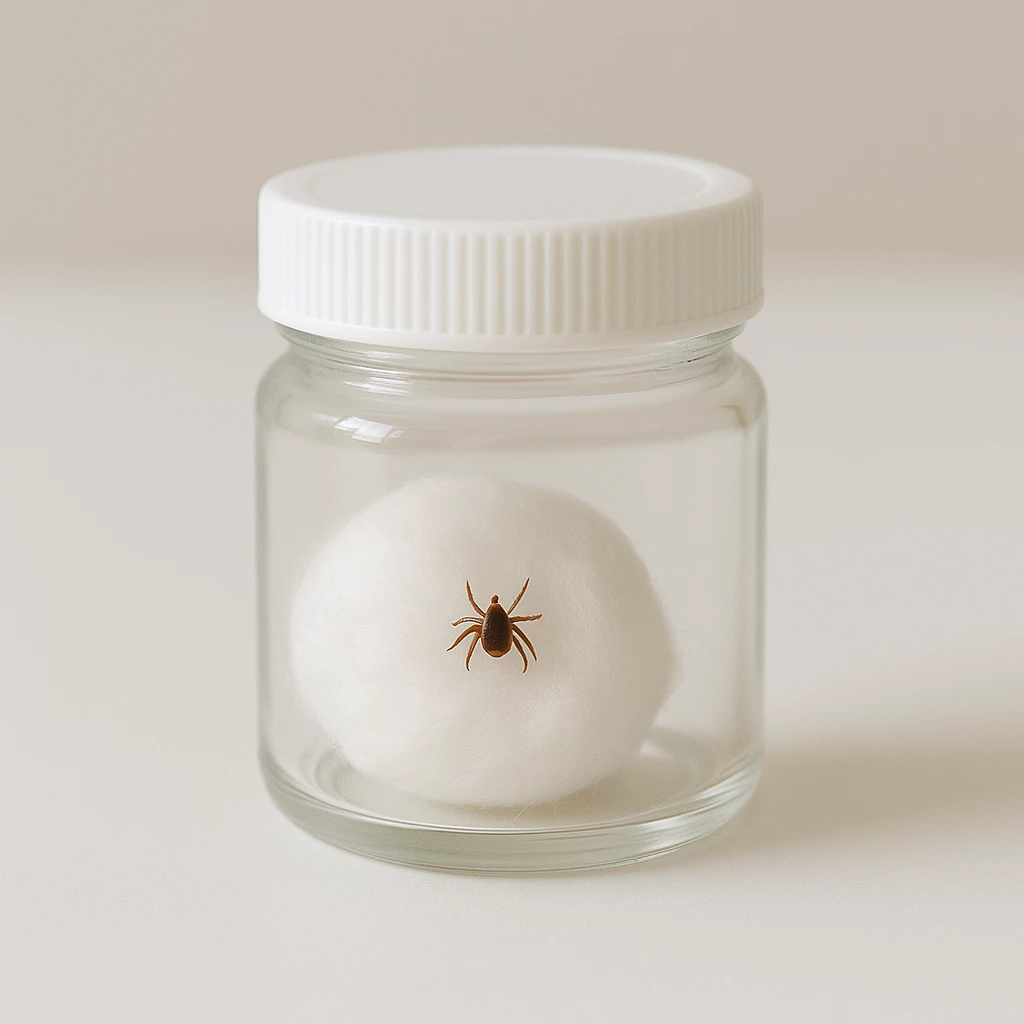
The procedure isn't over until you have dealt with the tick itself. Simply throwing it away isn't an option, and crushing it is dangerous. You have two correct paths, one of which (testing) can give you much greater peace of mind.
- Safe Disposal: Do not crush the tick with your fingers. Place it in a jar of rubbing alcohol or kerosene, or flush it down the toilet.
- Recommended Option: Place the live tick in a small, sealed jar with a damp cotton ball (to keep it from drying out). Take it to a veterinary or public health laboratory for testing (for Babesiosis, Lyme disease, etc.). This can help you understand whether your dog was exposed to an infection.
Troubleshooting: What to Do If Something Goes Wrong
Even experienced owners can have unforeseen complications. If you pulled too hard or the parasite chose a very difficult spot, the main thing is not to panic. Here are the solutions for the most common problems.
The Tick's Head is Stuck in Your Dog's Skin
This is perhaps the most common fear: the tick's body tore off, but a small black dot—its head or mouthparts—remains embedded in the skin.
- The tick is no longer feeding; the remaining mouthparts cannot transmit disease. The main danger now is a local inflammation, just like with a common splinter.
- Treat it like a splinter: clean the skin and a sterile (flame-sterilized and cooled) needle and tweezers with antiseptic. Gently try to lift and remove the pieces.
- If you can't get it or are unsure: Do not dig! You will only make it worse. Simply disinfect the area with chlorhexidine. Your dog's body will most likely expel the foreign object on its own in 3–5 days (it may come out with a small amount of pus).
The Tick is in an Ear, on an Eyelid, Near the Nose, or Between Toes
Sometimes, parasites choose the most difficult and dangerous places for removal. The general protocol remains the same, but there are critical nuances. Let's break down the tactics for each case.
- Tick in the ear: If it's on the outer ear flap (pinna), follow the standard instructions. If you see it deep inside the ear canal—do not try to remove it yourself! You could damage the eardrum. Go to the vet immediately.
- Tick on the eyelid, near the eye, or on the lips: These are high-risk areas. The dog is likely to flinch, and you risk injuring the eye. If you are not 100% confident you can restrain the dog perfectly, do not risk it—trust your veterinarian.
- Between the toes, in the armpit: These are common spots. Follow the standard instructions, but be especially gentle and thorough.
The Threat of Babesiosis: Symptoms That Require IMMEDIATE Veterinary Care

Removing the tick is not the end of the story. Unfortunately, it's only the beginning of a period of vigilant observation. The greatest danger is not the bite itself, but the diseases the tick may have transmitted. The main threat in many regions is Babesiosis (Piroplasmosis). The incubation period is from 2 days to 2 weeks.
Watch your dog closely! Your enemy is not the tick, but your own inattention.
List of "Red Flag" Symptoms (Go to the vet IMMEDIATELY):
- Lethargy, apathy, refusal to play. This is the first and most common sign. The dog is listless, doesn't greet you at the door.
- Refusal of food.
- High fever (over 103°F / 39.5°C).
- DARK URINE (the color of beer, cherry, or blood). This is a critical symptom, meaning red blood cells are being destroyed.
- Pale or yellowish gums and mucous membranes.
- Weakness in the hind legs, a wobbly gait.
If you notice even ONE of these symptoms, do not wait, do not search the internet for advice—take your dog to the veterinary clinic immediately! Babesiosis can be fatal if left untreated and may kill a dog in just 2–4 days. Every hour counts.
Prevention is the Best Medicine: How to Protect Your Dog from Ticks
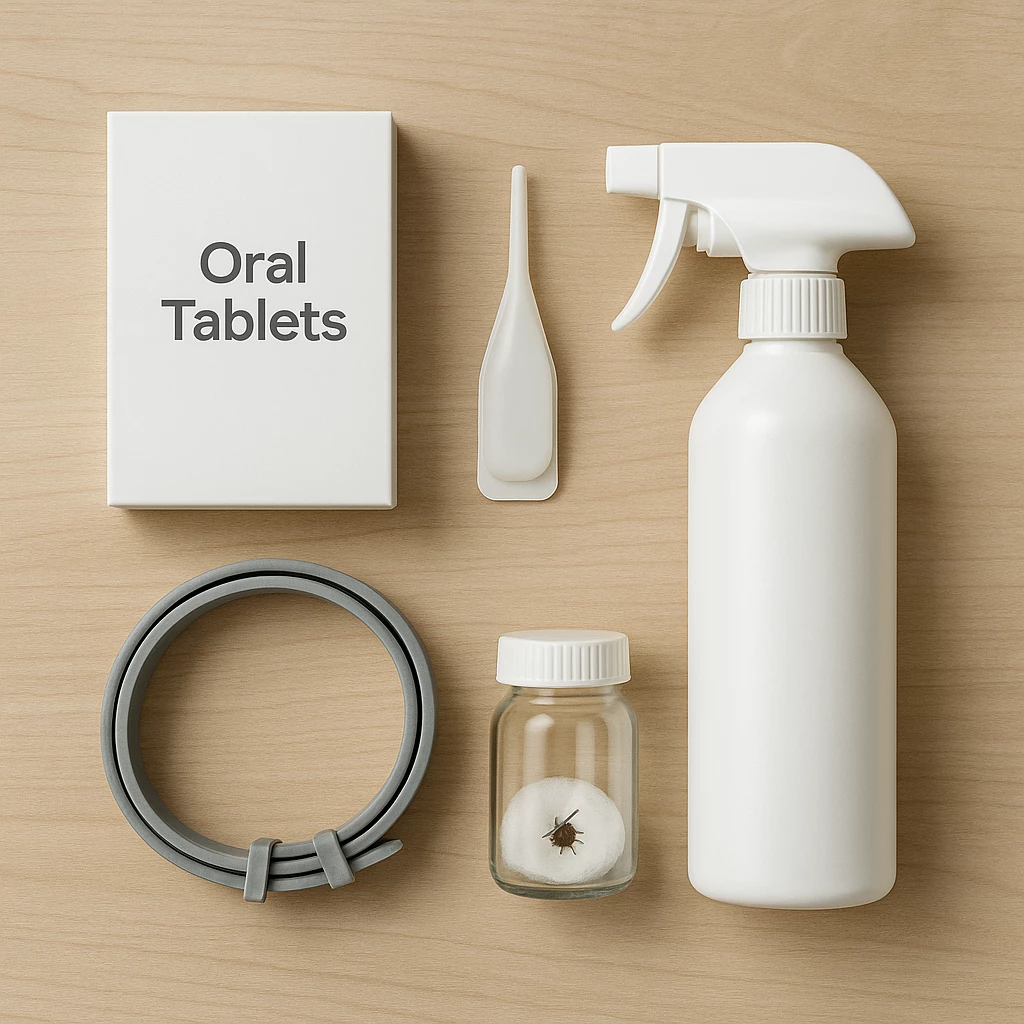
100% protection does not exist, but modern preventatives greatly reduce the risk of a bite. After you've gone through this stress, it's the perfect time to shift your focus from "reaction" to "prevention." Let's review how to protect your pet in the future.
| Preventative Type | Pros | Cons | Frequency |
|---|---|---|---|
| Oral Tablets (Bravecto, Simparica, etc.) | Very high efficacy. Not affected by swimming. Protects "from the inside." | Cost. Some (rare) potential for side effects. | Every 1–3 months |
| Topical Drops (Frontline, Advantix, etc.) | Easy to apply. Often protect against fleas as well. | Can be washed off (no bathing 3 days before/after). Can cause skin allergies. | Every 3–4 weeks |
| Collars (Foresto/Seresto, Kiltix, etc.) | Long-lasting (up to 8 months). No need to remember monthly treatments. | Can cause irritation on the neck. May have an odor. | 1–2 times per season |
| Sprays | Instant action. Good for "extra" protection before a hike in the woods. | Short-term effect. Must be applied thoroughly. | Before each walk |
And remember: check your dog after every walk. Pay special attention to the head, ears, neck, armpits, groin, and between the toes.
Frequently Asked Questions (FAQ)
We've covered the process from A to Z, but owners often have specific questions that need short, clear answers. Here are the most popular ones.
How quickly can a tick infect a dog?
It takes time for the tick to attach securely and begin feeding, a process that includes injecting its saliva. It is believed that for the transmission of Babesiosis, the tick must be attached for several hours to a full day. This is why prompt removal is critical.
Can a tick from my dog move to me?
Yes, the ticks that feed on dogs (like the Deer Tick or Brown Dog Tick) are often not picky and can also bite humans. This is precisely why you must wear gloves during removal.
How long should I monitor my dog after a tick bite?
Monitor your dog very closely for a minimum of 14–20 days. Be vigilant for any changes in behavior, appetite, or urine color.
The Most Important Things to Remember
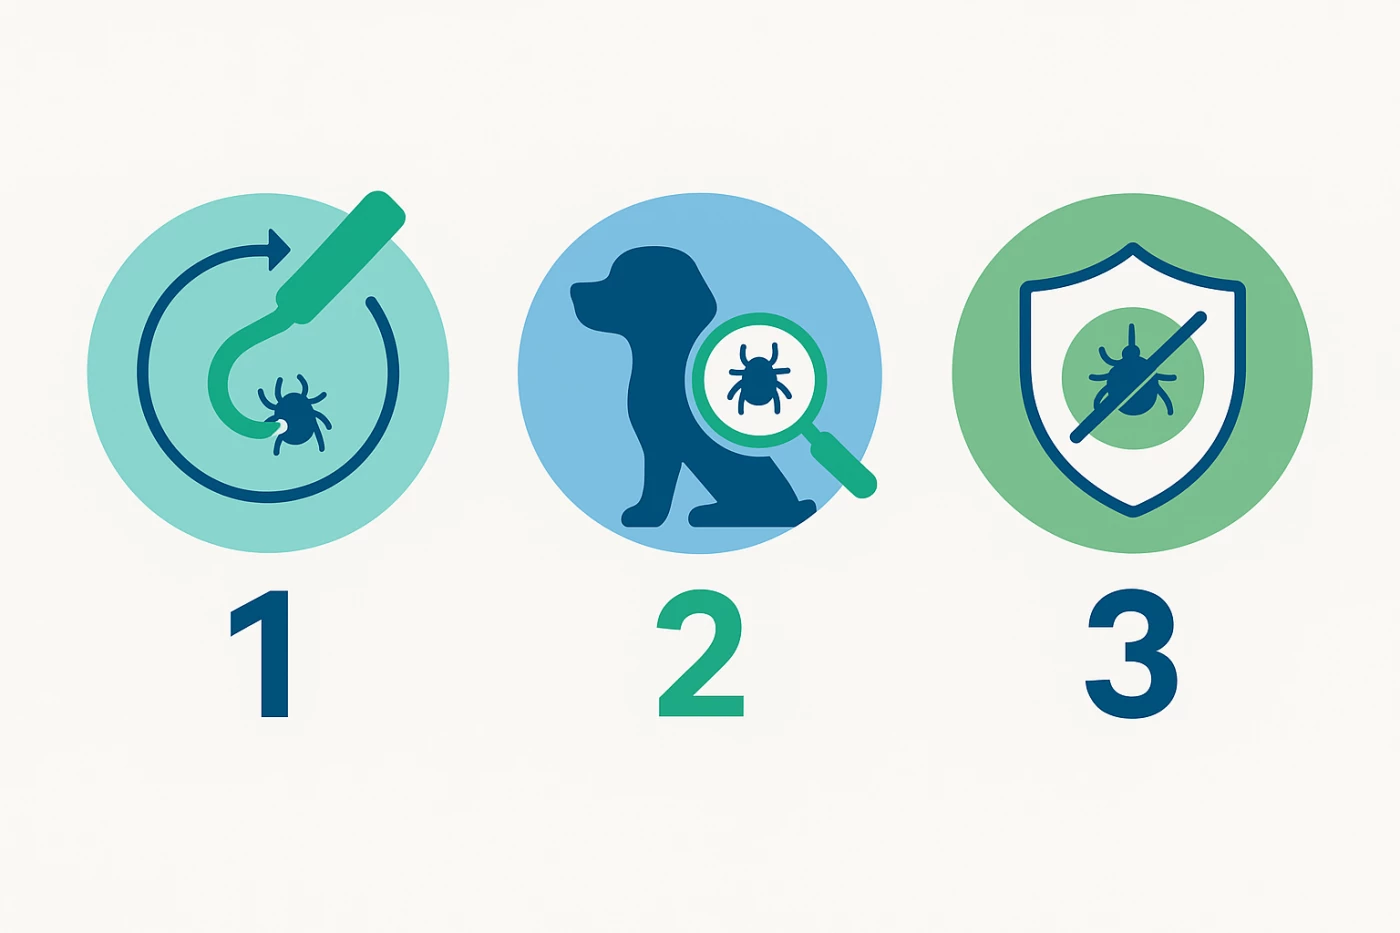
All the information about ticks boils down to three simple points. If you came here in a panic, just remember this:
- Twist, Don't Use Oil. Never pour liquids on the tick. Use a tick tool or tweezers to gently twist it out, like a screw.
- The Bite Isn't the Danger, the Symptoms Are. For the next two weeks, watch your dog like a hawk. Lethargy, refusal to eat, or dark urine means you must go to the vet immediately.
- Prevention is Key. After this is over, be sure to protect your pet with a reliable preventative (drops, tablets, or a collar) recommended by your veterinarian.
This article has been reviewed for accuracy by a licensed veterinarian and is aligned with veterinary best practices from leading organizations such as the CDC and the AVMA.